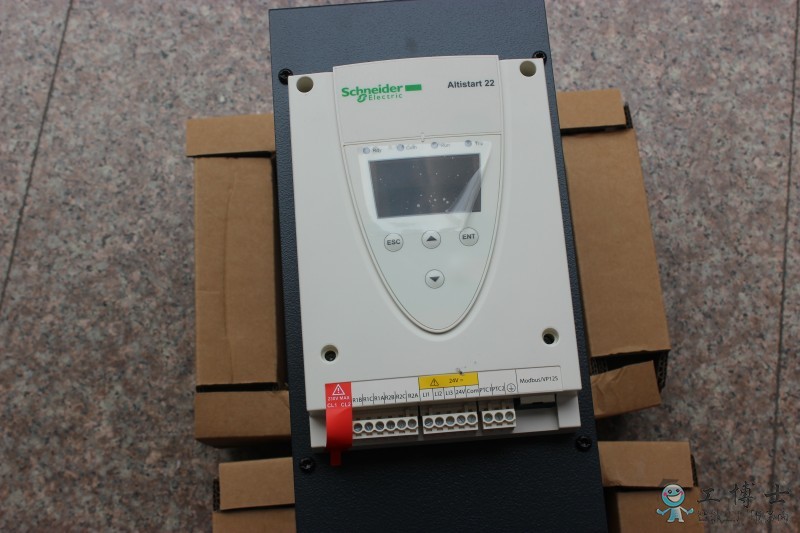
An ATS22C41Q is a soft starter designed for controlling the acceleration and deceleration of three-phase motors. When it doesn’t power on, it can be quite frustrating and disruptive. Below is an extensive analysis of potential reasons and troubleshooting steps for why an ATS22C41Q might not be getting power. We’ll cover various aspects, including electrical issues, installation problems, and component failures.
- Power Supply Issues:
- No Power at Source: Ensure that there is power at the supply source. Check the voltage levels with a multimeter to confirm that the power supply is within the required range for the ATS22C41Q.
- Incorrect Voltage: Verify that the input voltage matches the specifications of the ATS22C41Q. Using an incorrect voltage can prevent the unit from powering on.
- Power Quality: Poor power quality, such as fluctuations, surges, or sags, can affect the operation of the ATS22C41Q. Consider using a power conditioner if the supply is unstable.
- Wiring Issues:
- Loose Connections: Inspect all wiring connections to ensure they are secure. Loose connections can lead to intermittent power loss.
- Incorrect Wiring: Double-check the wiring against the installation manual. Incorrect wiring can prevent the unit from receiving power.
- Damaged Cables: Look for any signs of damage, such as frayed or cut wires, which could interrupt the power supply.
- Fuses and Circuit Breakers:
- Blown Fuses: Check if any fuses in the power supply line are blown. Replace them if necessary.
- Tripped Circuit Breakers: Verify that no circuit breakers have tripped. Reset any tripped breakers and investigate the cause of the trip.
- Internal Components:
- Faulty Control Board: The control board within the ATS22C41Q might be defective. Inspect for any visible signs of damage, such as burnt components or broken solder joints.
- Damaged Capacitors: Capacitors play a crucial role in power regulation. Look for any bulging or leaking capacitors and replace them if needed.
- Faulty Relays or Contactors: Internal relays or contactors might be stuck or damaged. Test and replace them if they are not functioning correctly.
- Environmental Factors:
- Temperature Extremes: The operating environment can affect the ATS22C41Q. Extreme temperatures, whether too hot or too cold, can prevent it from functioning properly. Ensure the unit is within the specified temperature range.
- Humidity and Moisture: Excessive humidity or moisture can cause electrical shorts or corrosion. Ensure the unit is installed in a dry environment or use appropriate enclosures to protect it.
- Firmware and Software Issues:
- Firmware Corruption: The firmware within the ATS22C41Q could be corrupted. Check if a firmware update or reinstallation is necessary.
- Configuration Errors: Incorrect settings or parameters might prevent the unit from powering on. Reset to factory defaults and reconfigure if needed.
- External Control Signals:
- Missing or Incorrect Control Signals: If the ATS22C41Q is controlled by an external device, ensure that the control signals are present and correct. Missing or incorrect signals can prevent the unit from powering up.
- Communication Errors: If the unit is part of a networked system, ensure that communication protocols are set correctly and there are no communication errors.
- Mechanical Issues:
- Installation Problems: Improper installation can cause mechanical stress or misalignment, affecting the power connections. Ensure the unit is installed correctly as per the manufacturer’s guidelines.
- Physical Damage: Inspect the unit for any physical damage that might have occurred during transportation or installation. Physical damage can interrupt the power flow.
- User Error:
- Incorrect Operation: Ensure that the user is operating the ATS22C41Q correctly. Refer to the user manual for proper operating procedures.
- Lack of Maintenance: Regular maintenance is crucial for the reliable operation of any equipment. Ensure that the unit is maintained as per the manufacturer’s recommendations.
- Diagnostic Tools:
- Use Diagnostic LEDs: Many soft starters, including the ATS22C41Q, have diagnostic LEDs that indicate the status of the unit. Refer to the manual to interpret these indicators.
- Error Codes: Check if the unit displays any error codes and refer to the troubleshooting section of the manual to understand what the codes mean.
- Professional Help:
- Technical Support: If you have exhausted all the basic troubleshooting steps and the unit still doesn’t power on, contact the manufacturer’s technical support for assistance.
- Professional Inspection: Consider having a professional electrician or technician inspect the unit. They have the tools and expertise to diagnose and fix issues that might not be apparent to a layperson.
Step-by-Step Troubleshooting Guide:
- Initial Checks:
- Ensure the power supply is turned on and is within the specified voltage range.
- Check all wiring connections for tightness and correctness.
- Inspect Fuses and Circuit Breakers:
- Replace any blown fuses.
- Reset any tripped circuit breakers and identify the cause of the trip.
- Examine Internal Components:
- Look for visible damage on the control board, capacitors, relays, and contactors.
- Test components with a multimeter if necessary.
- Check Environmental Conditions:
- Verify that the unit is operating within the recommended temperature and humidity ranges.
- Review Firmware and Configuration:
- Update or reinstall firmware if needed.
- Reset to factory defaults and reconfigure settings.
- Verify External Control Signals:
- Ensure control signals are correct and communication protocols are properly set.
- Inspect for Mechanical Issues:
- Ensure the unit is properly installed without physical damage.
- Consult Documentation:
- Refer to the user manual for specific error codes and diagnostic LED meanings.
- Seek Professional Assistance:
- Contact technical support or a professional technician if the problem persists.
By following these detailed steps and considering all potential causes, you can systematically diagnose and resolve the issue of why the ATS22C41Q is not getting power. Proper maintenance, correct installation, and careful handling of the unit will also help in preventing such issues in the future.